In our previous article we have seen how to create and run virtual machines from command mode. In this article we will be seeing how to create and run virtual machines through GUI.
The application we are using here is Virtual Manager collectively called as virt-manager.
The Virt-manager application is a desktop user interface for managing virtual machines through libvirt. It manages KVM VMs, Xen and LXC (linux containers). Virt-manager presents a summary view of running domains, their live performance & resource utilization statistics. The Wizard enables the creation of new domains, and configuration & adjustment of a domain’s resource allocation & virtual hardware.
Network Install:
Creating a VM using network install requires an internet connection to get the iso image according to the requirement.
Step 1: Launch the Virtual Manager that you have installed, if not use the below commands to install virt-manager on your system. For RPM based machines:
$ yum install virt-manager
For Debian based machines:
$ apt-get install virt-manager
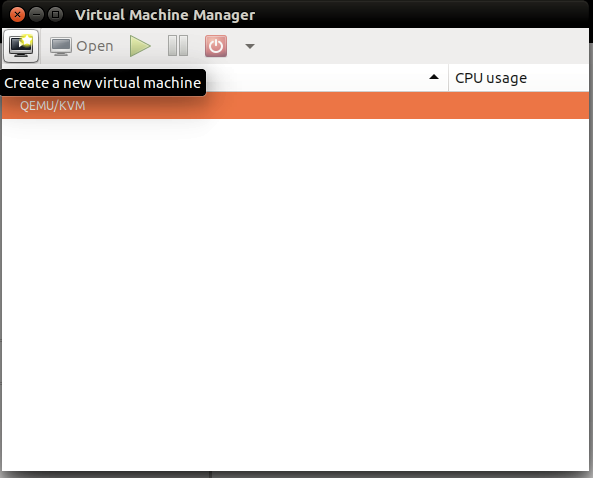
Launch your Virtual manager.
Step 2: Select the create a new virtual machine icon at the top left corner
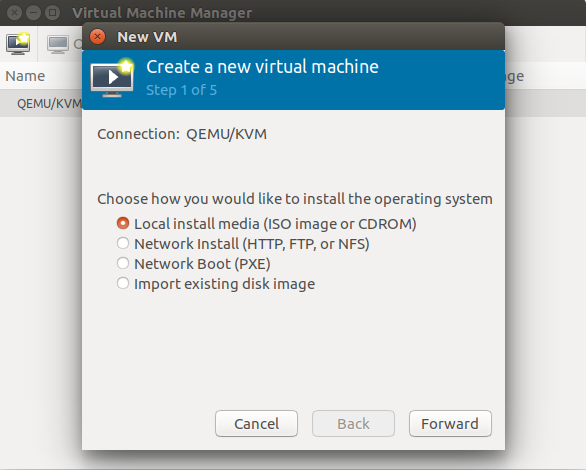
Step 3: Select the second option for network install and click forward.
Step 4: Now enter the URL for the ISO image and click forward.
For Centos images click here.
For Ubuntu images click here. Step 5: The next prompt allows you to configure your VM's RAM and VCPU.
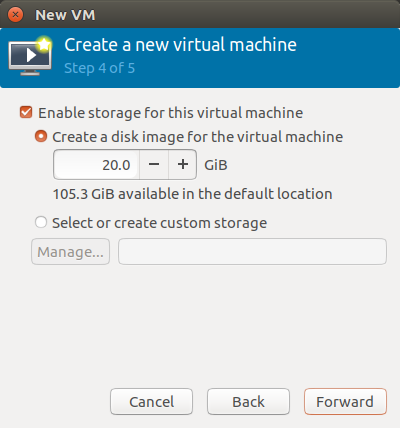
Step 6: The following prompt will define the HD space for your VM. Enter the desired space and click forward.
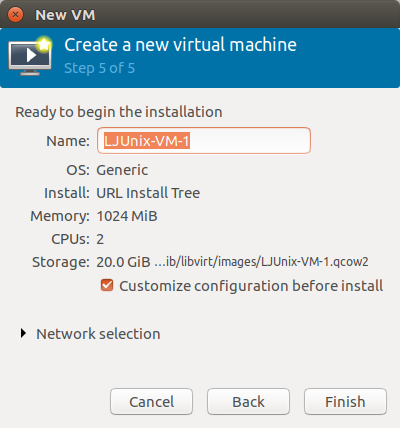
Step 7: The final prompt is to define the VM name and also you can customize your VM by enabling the Customize configuration before install checkbox. Select finish.
You can check your configuration before beginning the installation.
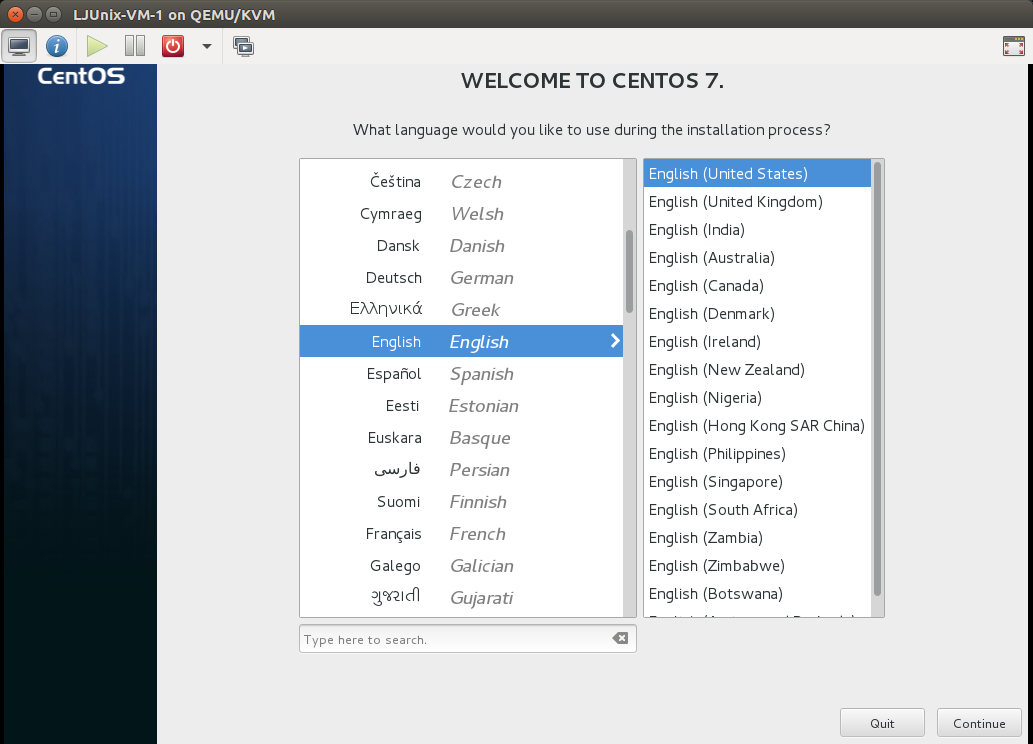
Step 8: Select Begin Installation to start the installation process
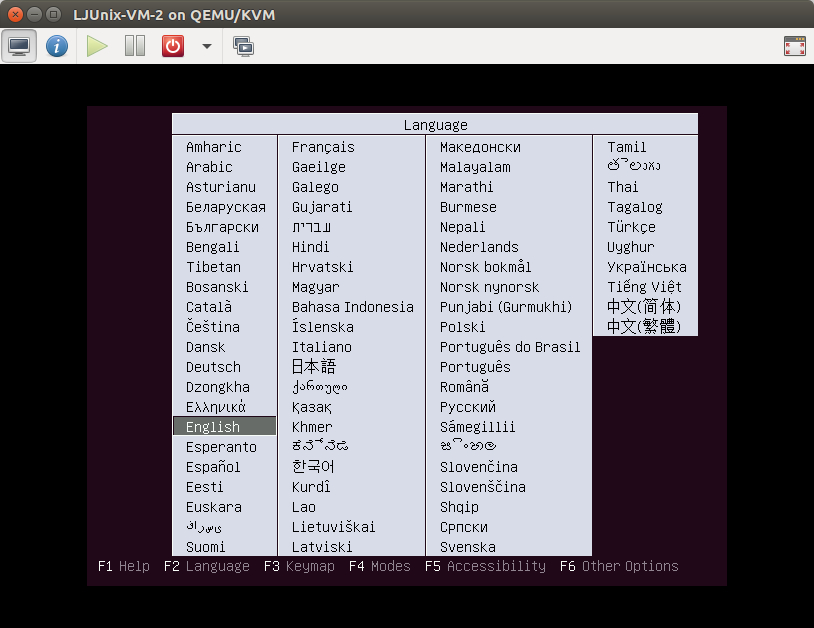
Now the installation process starts,
Local Media Install:
The local installation using VM is to install your VM through a disc image stored in your system. You can define the path of IOS image or you can use the default path for storing the ISO images.
The default path storing ISO images of virt-manager is /var/lib/libvirt/images/
[jhony@ljunix~]$ ls /var/lib/libvirt/images/
ubuntu-10.10-desktop-amd64.iso ubuntu-18.04-desktop-amd64.iso
ubuntu-17.04-desktop-amd64.iso
Step 2: Select the create a new virtual machine icon at the top left corner
Step 3: Select the first option for local install media and click forward.
Step 4: Click on the browse which will forward to select the ISO images loaded on the images path.
Step 5: Select the ISO image that you want to run on your VM and click choose volume.
Step 6: Click forward to proceed VM configuration.
Step 7: Now the prompt allows you to configure your VM's RAM and VCPU.
Step 8: The following prompt will define the HD space for your VM. Enter the desired space and click forward.
Step 9: The final prompt is to define the VM name and also you can customize your VM by enabling the Customize configuration before install checkbox. Select finish.
You can check your configuration before beginning the installation.
Step 10: Select Begin Installation for local media installation.
Your installation will be started from the local media,
Now you can manage your VM's by editing their configuration and etc.,. through Virtual Manager.
Connecting Remote Hypervisors:
You can also manage remote hypervisors through ssh,
Select the Add Connection to connect to a remote hypervisor,
Enter the hostname or IP of the Hypervisor and connect it through SSH tunnel.


Comments